I'm excited to present my poster next week at ISTE 2016! Click on the image below to view my Google Slides presentation on our transformation to a library learning commons.
How do you build enriching maker and learning spaces within the confines of a jam-packed fixed schedule?
If you are new to the idea of making in the library, there are great blogs dedicated to this movement. I recommend checking out Laura Fleming's Worlds or Learning, and Diana Redina's Renovated Learning. Diana Redina defines a maker space as "a place where students can gather to create, invent, tinker, explore and discover using a variety of tools and materials." Laura Fleming provides some best practices for successful maker spaces, which includes focusing on themes and curriculum connections. Maker spaces provide great opportunities to foster creativity, collaboration, and innovation, but...what if you don't have a dedicated maker space, what if you don't have a flexible schedule, what if, like me, you teach eight 30-minute classes a day with no transition time? What if like me you share your library with a second media specialist, who teaches a class (sometimes a different grade) at the same time? What if like me, you have 1,000 students, coming to the library twice a week? How do you begin to make this work? This article shows our journey to initiate stations within our fixed library schedule. Some of these stations could be considered maker stations, others we call our learning stations.
A full tour of our library learning and making stations
Step 1: Consider your Curriculum Connections.
The first step, as with any unit planning should be to begin at the end. Reflect on why you wish to adopt learning and making stations in your library. What are the student learning outcomes and standards you wish to address. These are critical questions to consider, as you must be prepared to answer them when asked by classroom teachers, parents, and administrators.
My colleague, Linda, and I began by looking at the K-12 mission statement and program goals for our district library learning commons:
Our K-12 Vision Statement:
The Learning Commons of Wilton Public Schools will be the physical and virtual core of our inquiry-based learning community. By fostering the development of socially responsible, empathetic and compassionate citizens, members will become creative and critical thinkers who effectively innovate and collaborate in a globally interconnected society.
Our K-12 Program Goals:
1. Inquiry and Information Fluency
2. Literature Appreciation
3. Technology Skills and Concepts
4. Digital Citizenship
5. Collaboration Innovation and Communication
Learning and making stations fit well with our district library learning commons vision. They also provided opportunities for more authentic, meaningful, and student-centered learning experiences. The planning behind each learning and making station began with the question, "which of our program goals is this station addressing?" We also wrote down Common Core State Standards, AASL,and ISTE NETS that applied.
Step 2: Create Some Initial Learning/Making Station Themes with "I can Statements"
With a fixed schedule and combined classes totaling 45 students meeting at the same time, we decided to create 8 separate learning and making stations in the library. Students come to library twice a week, so we decided to make their second library visit of the week a stations day. We used the entire library space to spread out these stations. All of our K-2 students would be engaged in the same stations, with minor modifications. Students would rotate through these 8 stations, trying a new station each week over a 2-month period. Each station would address one of our K-12 program goals (communication, collaboration and innovation became a central theme). We placed a sign at each station, with an "I can" statement to provide direction for the students as to their learning objective.Our signs were inspired by Heidi Neltner's blog post on Maker Centers. We also placed tech instruction signs for our parent volunteers to assist students.
This news letter to the parents reveals our initial 8 stations and "I can" statements
These station signsshow some additional centers during a later unit, which included a book recording station, technology timeline museum, and presentation station. Here's a Vine video of those new stations.
Table sign for our "Presentation Station"
Step 3: Begin to Build a Culture of Innovation
Before we rolled out the stations, we worked to prepare our students and parent volunteers for this significant shift in the library experience. This was my first year as a media specialist in our school, and up until this year, the library still followed a very traditional model. In order to make this work, we needed to prepare students with our expectations. Additionally, we needed to build support among the parent volunteers, so that they could assist students at the stations, and see the value in these changes.
To build a culture of innovation with the students, I followed the advice I learned from Maureen Schlosser's (@MaureenSchlosse) presentation on STEAM activities in the library at CECA/CASL 2015. Maureen's Knowledge Quest article,5 Books to Introduce STEAM, provided some great ideas for books to build this culture. Using this article as a resource, I began pre-teaching with the following lessons:
Day 1. We Read and discussed the picture book "What Do You Do With An Idea?" written by Kobi Yamada and illustrated by Mae Besom. As a class, we discussed how we can make ideas grow, not be embarrassed by our ideas, and support each other. Kindergartners and first graders drew pictures of exciting ideas they wanted to grow. Second graders wrote about their ideas and posted online to a Padlet wall. We then introduced the idea of learning and making stations, and let the students know we would soon have a place to build our ideas.
Our 2nd grade students' Padlet of Ideas
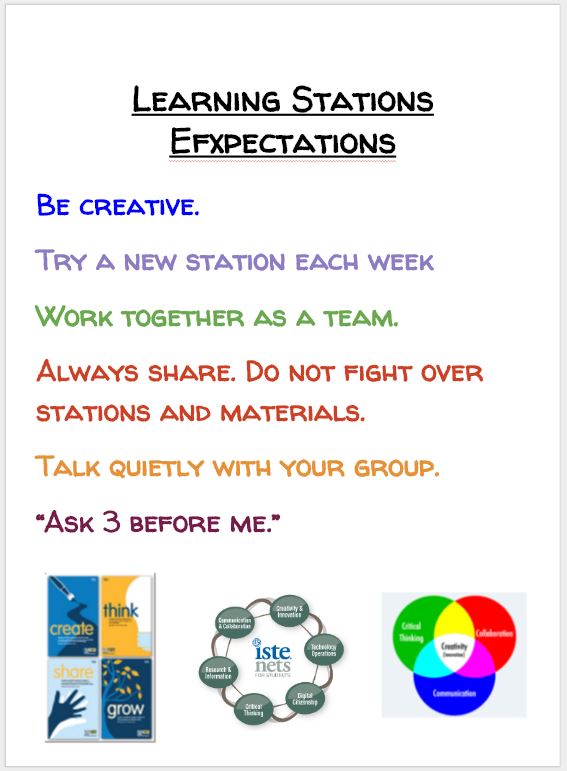
Day 2. We read and discussed "Too Much Noise in the Library" written by Susan Margaret Chapman and illustrated by Abby Carter. As a class we discussed how libraries can be lively and loud, but differentiated between good noise and bad noise. As a class we discussed expectations for the upcoming stations.
We reviewed these expectations at the start of every stations day
Day 3: We read and discussed "The Most Magnificent Thing" by Ashley Spires. This was a great text
to discuss perseverance, and how we keep from quitting when it gets tough. Day 4: We began our stations. I called on students one at a time to sign up for a station. We limited the number of students at each station, and used the Smart Board to track totals.
A Smart Board file used to track totals each class
Step 4: Plan for Space & Technology Needs
Without a dedicated maker space, we decided to roll out the stations throughout the entire library. This spread-out spacing provided some sound barriers between groups that were collaborating, and other students who were working independently or recording their voices on iPad presentation apps. Our stations involved some robotics purchases, but these are not necessary to getting started. There are wonderful ideas out there, including the linked sites in this posting, for affordable and low tech maker stations. You'll need to consider your students, space, finances, and even scheduling. With our fixed schedule of 8 library sessions a day, with 2 classes meeting at the same time (over 350 students each day, about 1,000 students coming twice each week), we stayed away from maker stations that required a lot of perishable supplies and clean-up. If you are interested in involving coding/robotics in your stations, here's what we have tried and found successful:
1. Scratchjr App - This is a free app, but since it is not web-based, it requires a tablet (iPad or Android) to run. Check out my previous blog post about how Scratchjr can be used as a multi-media presentation tool for students to share out stories or their learning.
2. Dash & Dot - Created by the Wonder Workshop, these robots provide great opportunities to teach the fundamentals of coding and robotics. They come with a collection of free apps, which includes the Path App (for all ages including pre-readers) and Blockly (for students 8+). Dash retails for $149.99, and Dot for $49.99. Additional accessories can be purchased including a ping pong ball launcher for Dash. The Wonder Workshop also provides great resources and lesson ideas for teachers.
3. Cubelets - Created by Modular Robotics, these robot building blocks enable students to construct interactive robots by simply snapping the various cubes together in purposeful arrangements. No coding or wiring required. The Cubelets station is incredibly popular, and provides great opportunities for critical thinking and collaboration. Like Dash & Dot, they come with adapters so that you can build on them with Legos. One downside of Cubelets is that they are pricey. If you have a group of students working together, you will want at least 3 batteries, and some larger kits. Be prepared to spend over $500. Over the year, I did experience some problems with defective cubes, but costumer service was excellent and supportive, so I kept coming back for more Cubelets.
4. Makey Makey - This easy to use invention kit lets you substitute everyday conductive objects for your keyboard by alligator clipping the object to the Makey Makey (a credit card sized device similar to an Arduino Board). This enables the user to turn objects like bananas, play dough, metal, water, or people into game controllers, musical instruments, camera clicks, or whatever you dream up. The Makey Makey plugs into a computer through the USB, no downloads required. This worked great for 2nd graders, but could be conceptually challenging for K-1. I'm looking forward to adopting a simpler version, the Makey Makey Go, with K-1 next year. At our stations this year, we brought up a code for a piano (through Scratch) and had students build a piano out of some provided objects. We also challenged students to make game controllers for pong and pacman. This also provides an opportunity to teach computer coding. The Makey Makey Classic runs for $49.95, and the simpler "Go" version for $24.95. Side note: because of wheat allergies, we used Crayola Magic Clay instead of Play Dough at our station.
Again, these purchases are not required to begin learning and making stations, and there are other robotics and coding products out there. But we were pleased with these devices and are happy to share our use of them. We were fortunate enough to have the support of our PTA and Wilton Education Foundation in making these purchases possible. If that is not possible for your library, you may want to check out options like Donors Choose to crowd-source funding. If you're looking for other great early elementary school ideas, check out Nan Stifel's Blog and follow her on Twitter (@nstifel). Her ISTE 2015 poster presentation on pairing books with maker activities introduced me to Cubelets.
Step 5: Just Go For It!
After all of our planning, we still didn't feel ready and had no idea if this was even going to work. Would students be engaged? Could they handle the independent work? Could two library media specialists coordinate a combined class of 45 students working in 8 separate groups? Throughout the 8 week unit, we made minor adjustments in the layout of stations, modifying expectations for grade levels, and eliminating an origami station that required too much teacher support. In the end, we were amazed by the high levels of student engagement and collaboration. To quote a colleague, who it turns out was quoting Victor Kiam, "even if you fall on your face, you're still moving forward"
Some Student Data:
At the end of our first 8-week session, we used Nearpod to poll the 2nd graders about their experience. Here are some findings:
If you read through this entire blog post, I'm very impressed! Please leave a comment or questions below! If you are attending ISTE 2016, come visit me at my poster presentation!
I can't believe it's been over 6 months since my last blog post! The adventures in library rolled on, but a brand new adventure in fatherhood eclipsed the blogging time! When we last left off, I had blogged about my decision to use Scratchjr during Hour of Code month in December. The posting explained how Scratchjr goes beyond introducing the concepts of coding to early readers, by empowering students to share their learning, and create and publish their own interactive multimedia projects. With Scratchjr, you don't just learn to code, you code to learn. Today's post picks up where we left off, at the end of the Hour of Code month.
By the end of the month, after 6 brief library visits, the Kindergartners were presenting their creative wordless fiction stories that they coded, while the 2nd graders were coding interactive presentations that taught the kindergartners about an animal they researched. These students had never used Scratchjr before, and now they were harnessing its power to share their learning with their peers in a breakout event.
Some examples of student work and our breakout event:
2nd grade students present their animal projects that they coded in Scratchjr. They are presenting to a kindergarten class that has library at the same time, and had not yet begun their coding unit.
A kindergartner teaches his peers how to code at a breakout event in our library. He is teaching fellow kindergartners from a separate library class that had not yet begun their coding unit.
These are some more samples of the animal projects created by our 2nd grade students at the end of their 6 library visits.
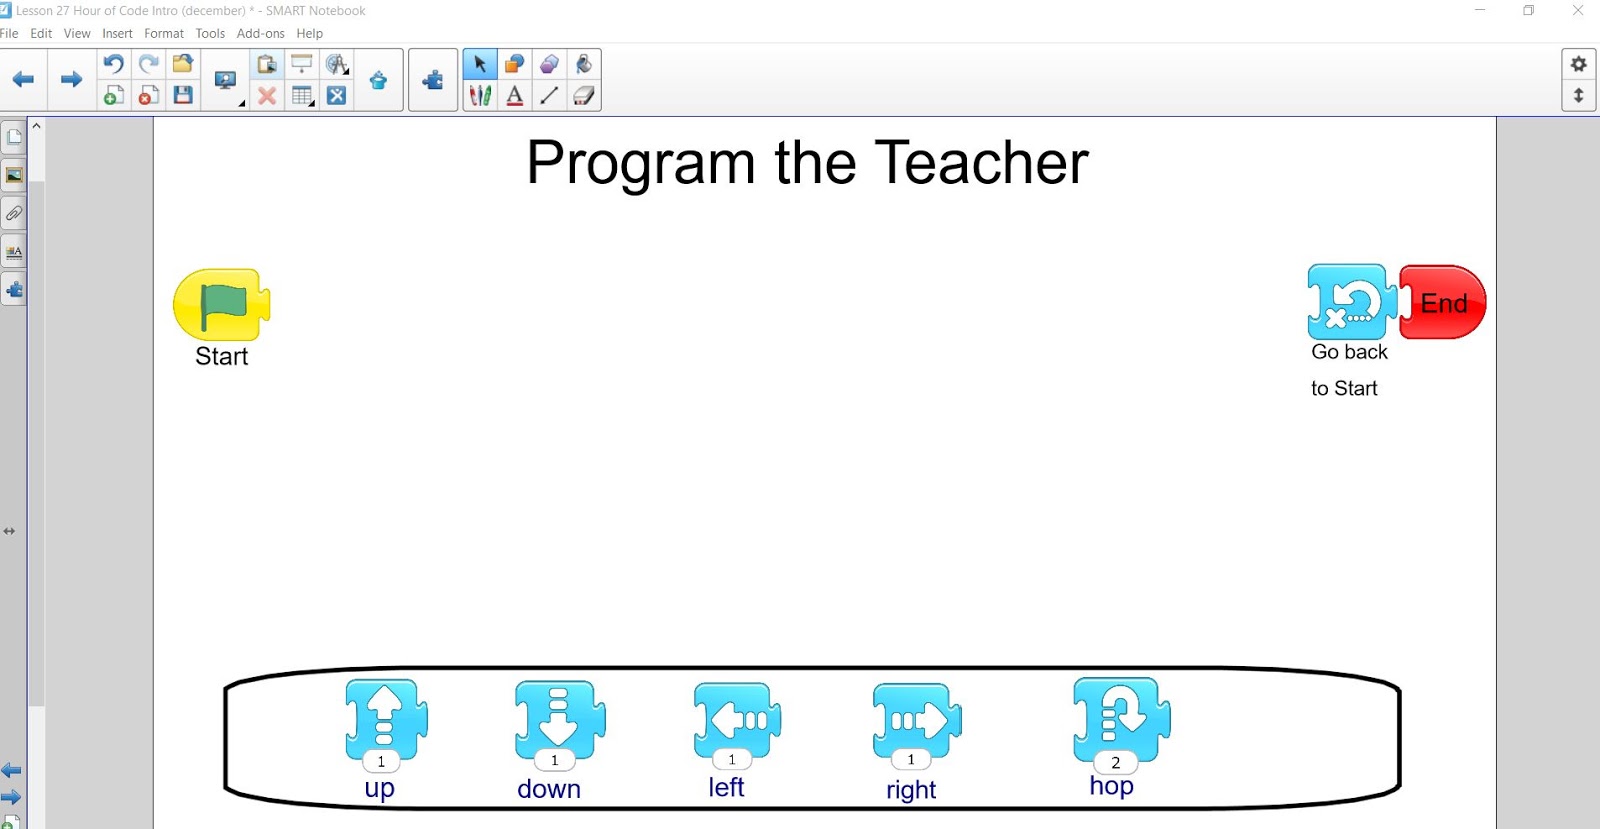
I was blown away by how the students picked up programming in Scratchjr, and harnessed its power to create authentic and meaningful work that they shared with their peers. Here's how we got there: Lesson 1 (20 minutes): Before handing out the iPads, I used SMART notebook to introduce the concept of coding in Scratchjr. I placed images of the some basic movement blocks on the notebook page, and turned on the "infinite cloner", so that students could add the blocks to a line of code by dragging the image with their finger on the SMART Board (see below). We discussed what programming is, and reviewed the meaning of the movement blocks. Students raised their hands to come up to the SMART board, and create a line of code for the teacher to act out. Students then volunteered to act out the code themselves. After this initiation activity, students received their iPads and were directed to the app. I walked them through this basic intro lesson lesson from these Scrathjr playrgound resources.
The SMART notebook page mentioned above. The blue movement blocks have the "infinite cloner" turned on.
Lesson 2 (20 minutes): We played the same SMART board initiation activity from last class, "program the teacher", and I acted out movements that students selected on the board. Students then volunteered to act out new code as well. I then walked the students through the second basic lesson from the Scrathjr playrgound.
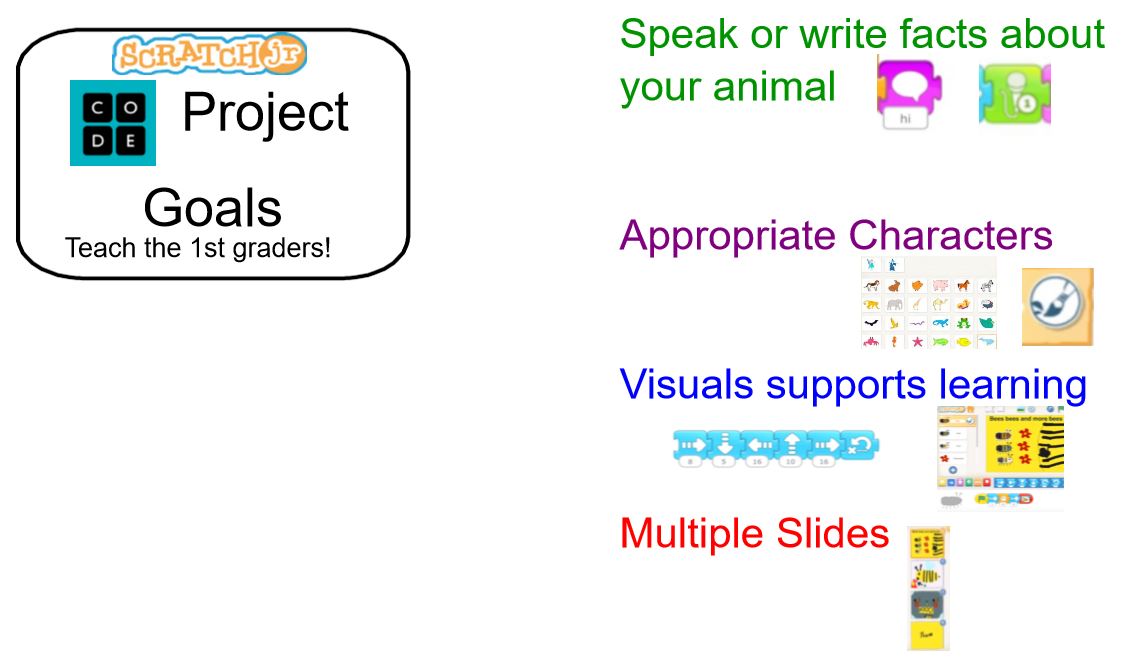
Lesson 3 (20 minutes): I introduced my students to their main goals for this coding project. K-1 students would create their own wordless picture book stories using Scratchjr. 2nd grade students would create an interactive presentation about an animal that they were already researching that month. Before coding, I shared the wordless picture book Flora and the Flamingo with my K-1 students. 2nd graders watched student work samples on YouTube posted by Jacob Lee. I introduced some new Scrachjr blocks to students and let them begin their projects.
Instruction slides from the SMART notebook file
Some new blocks I previewed
Lessons 4-6 (about 1 1/2 hours total): I reviewed the project goals at the start of each class (see images below) with K-1 and grade 2 on the SMART Board. I reviewed some various coding blocks with each class, and created some examples of what students could do in Scratchjr by mirroring my iPad (using an Apple TV). K-1 students also read some additional wordless picture books. Mostly, I stepped off the stage and gave the students time to work.
SMART Board slide with goals for 2nd graders
SMART Board slide with goals for K-1 students
Lesson 7: The break out event! My students presented their projects to the students from the other library class (we have two library media specialists each teaching at the same time, but not always to the same grade level). My colleagues' students had not yet begun learning to code in Scratchjr (we have only one iPad cart). Her students learned about Scratchr from mine, while enjoying their fiction stories (K-1) and presentations about animals (2nd grade).
Learn more about Scratchjr online, and post below with any comments or questions!